Web Interface Guide
The Tasmota Remote Updater includes a modern, responsive web interface for managing and updating your Tasmota devices.
Starting the Web Application
To run the web application:
# If using a virtual environment, make sure it's activated first
source venv/bin/activate  # For standard venv (bash/zsh)
# OR
source .venv/bin/activate  # For uv (bash/zsh)

# Then run the web application
python server.py
The web application will be available at http://localhost:5001
Interface Overview
The web interface provides a clean, card-based dashboard for managing your Tasmota devices:
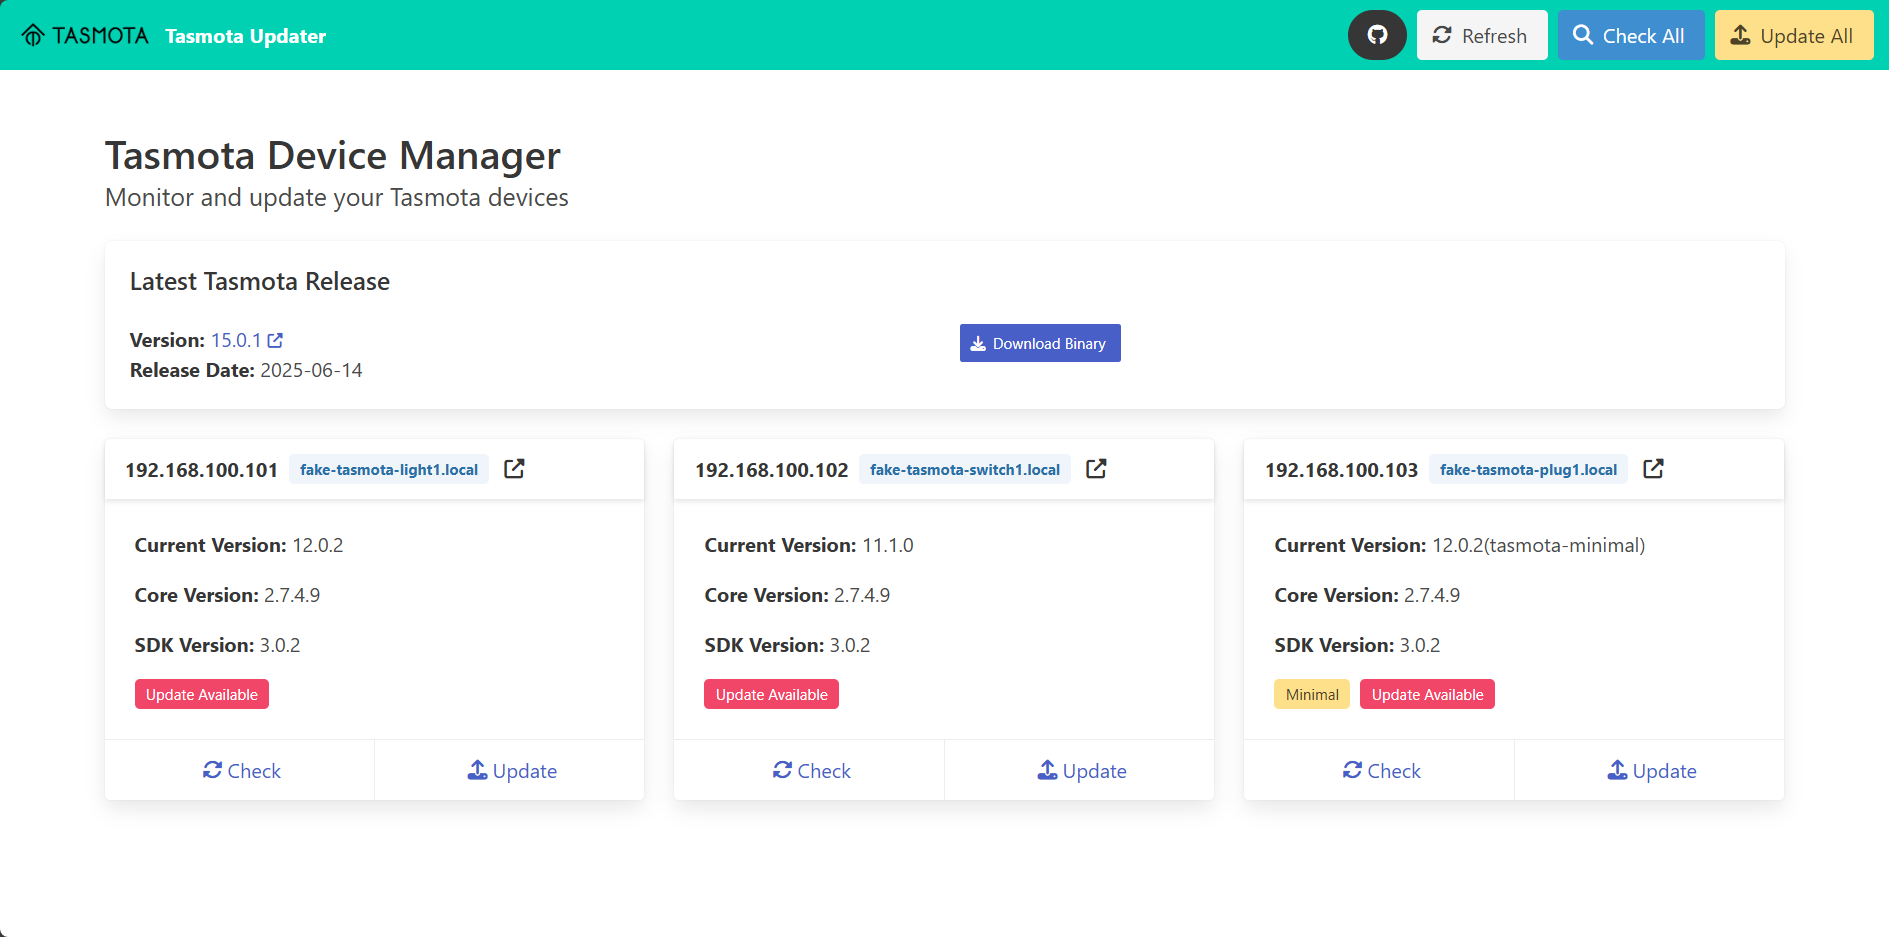
Main Components
- Navigation Bar: Contains the application title and main action buttons
- Latest Release Info: Shows information about the latest Tasmota firmware release
- Device Cards: Each card represents a Tasmota device with its status and actions
- Action Buttons: Buttons for refreshing, checking updates, and updating all devices
Features
Device Management
Each device card shows:
- Device IP address and DNS name (if available)
- Current firmware version
- Status indicator (online/offline/updating)
- Update availability indicator
- Individual action buttons
Device Actions
For each device, you can:
- Check Status: View the current status and firmware version
- Check for Updates: Compare the device's firmware with the latest release
- Update Firmware: Initiate a firmware update for the device
- View Details: See additional information about the device
Batch Operations
The navigation bar contains buttons for batch operations:
- Refresh: Reload all device information
- Check All: Check for updates on all devices at once
- Update All: Update all outdated devices with one click
Finding Devices on the Network
The Manage Devices section has a Find Devices button that opens a search dialog. It offers two searches, and you pick one — nothing runs automatically, not even when the dialog opens:
- Search via mDNS: listens for devices announcing themselves. One click, no parameters. It only works when the app shares the network with the devices — inside a bridge-network container it will always come back empty, and says so.
- Scan Network: probes every address in the range you give it. The field is prefilled with a guess at your local network. The scan sends one HTTP request per address, which is why it takes a deliberate click rather than happening by itself.
The result is a list, not an action. Devices already in your configuration are shown but cannot be selected again, and password-protected devices are marked "Credentials needed" — discovery never sends credentials, so you add those yourself afterwards.
Selecting devices and pressing Add Selected to List puts them into the
editor as unsaved rows. Nothing is written to devices.yaml until you press
Save, which gives you the chance to fill in usernames and passwords first.
Closing the dialog stops watching the search, not the search itself — it ends on its own within about 25 seconds. That is why the button says "Close" rather than "Cancel".
Real-time Feedback
The interface provides real-time feedback during operations:
- Loading indicators show when operations are in progress
- Success and error messages are displayed prominently
- Status indicators update automatically
API Documentation
The web application includes a comprehensive REST API with Swagger documentation available at http://localhost:5001/apidocs/
The API enables: - Retrieving device information - Checking device status - Fetching latest Tasmota release information - Performing updates on individual devices - Batch updating multiple devices
Configuration
The web interface uses the same devices.yaml file as the command-line tool. Any changes made to this file will be reflected in both interfaces.
Technical Details
The web interface is built with:
- Backend: Flask (Python web framework)
- Frontend: HTML5, Bulma CSS framework, and Alpine.js
- API Documentation: Swagger/OpenAPI